How to record and transcribe a Conversation?
Overview
This article provides a step by step guide to recording a conversation and submitting it for transcription using the Dictalogic Conversation to Text module.
Applies to
All Users
Step 1: Record Your Conversation
Conversation to Text works with existing recordings. You can record a conversation using any of the following methods: the Dictalogic mobile app (iOS or Android), a digital voice recorder, your computer’s built-in or external microphone using recording software, a video conferencing platform such as Zoom or Microsoft Teams, or a smartphone voice recording app.
For best results, ensure all participants are close enough to the microphone to be clearly audible. A central recording device in a meeting room, or individual headset microphones on a conference call, will produce the most accurate transcription.
Step 2: Log In to Dictalogic
Log in to your Dictalogic account via the web portal or the mobile app.

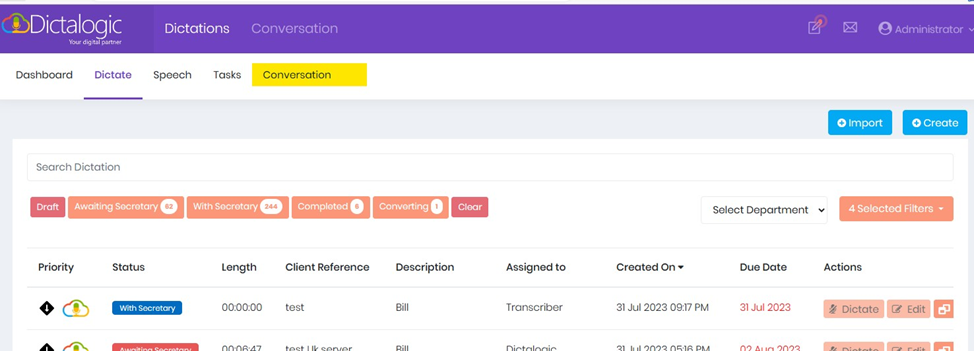
Step 3: Navigate to Conversation to Text
From your dashboard, navigate to the Conversation to Text module. If this module is not visible, contact your administrator to confirm it is enabled on your account.
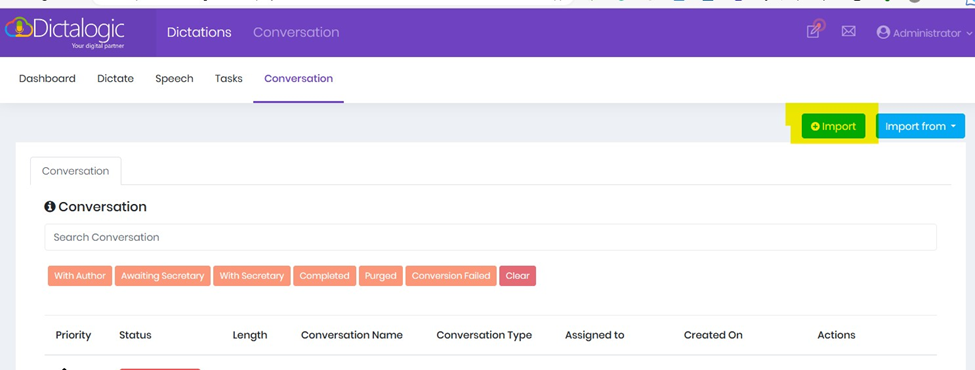
Step 4: Import Your Recording
Select the option to import or create a new conversation recording. Choose your audio or video file from your device.
Step 5: Add Conversation Details
After uploading the file, you will be prompted to enter key details, including:
- Conversation Name – A clear title to help identify the file later
- Cognitive Model – Select the speech recognition model you wish to use for transcription
Once all required details are entered, click Save.

Step 6: Automatic transcription begins
- After saving, the conversation is added to the dashboard grid as a new row.
- Dictalogic will automatically begin transcribing the audio or video.
- The transcription process runs in the background, no manual steps required.
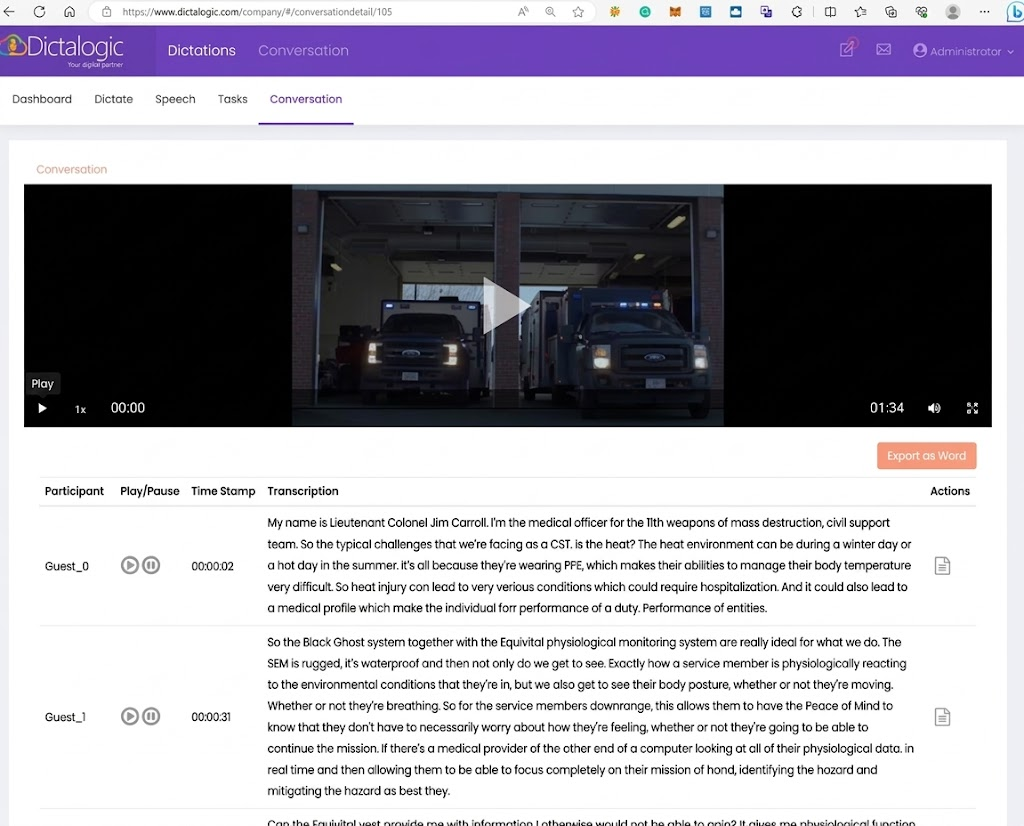
Step 7: View the transcription
- Click on the conversation from the dashboard grid.
- The Conversation Detail View opens, displaying:
- The audio or video player
- The live transcribed text in a conversation (script style) format
This view allows you to follow along with the recording while reviewing the transcription in real time.
Step 8: Share or Export
Once satisfied with the transcript, you can share it with colleagues or export it for use in reports or other documents.