Dictalogic foot pedal setup guide
Knowledge Base ID : KB00013
Overview
Dictalogic Dictalogic supports 99% of USB-enabled foot pedals. The transcriptionists can use the foot pedal to control playback buttons such as start, stop, or pause and increase or decrease the speed at which it is playing, and Authors or Fee earners can use a Speech mic to Record, Play/Pause, Rewind/Forward.
Applies to
Super Transcribers, Transcriber
What to do
Following are the steps required to enable foot pedals on the transcriber machine.
- Install Dictalogic-USB-Device MSI
- Install Browser extensions for Chrome and Edge
- Create a Hardware profile.
- Assign User to Hardware profile.
- Sign out and Sign in to view the change.
Install Dictalogic-USB-Device MSI
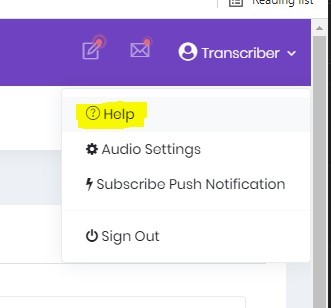
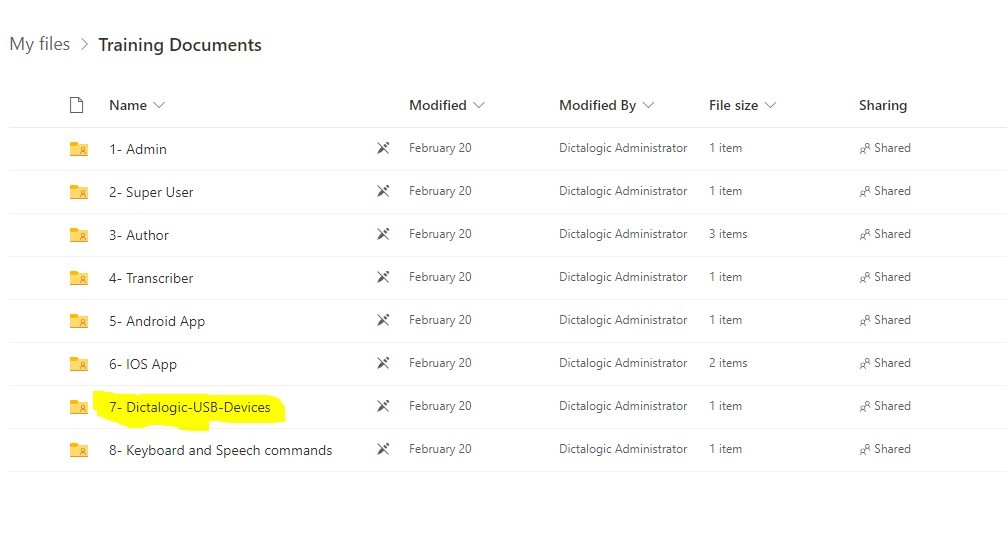
Click on “Help” under the username to go to the Dictalogic SharePoint location to download the MSI called
7- Dictal7- Dictalogic-USB-Device MSI and install as shown in the figures below.
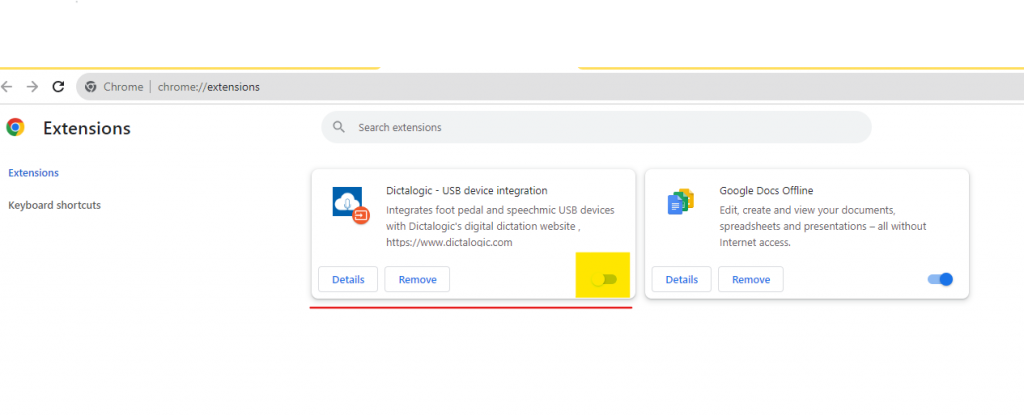
Dictalogic-USB-Device MSI automatically installs the Google Chrome extension and prompts the User to enable it, or the User can go to Extensions and enable it manually, as shown in the image below.
On enabling Extension, the User would see the Dictalogic icon appear in the system tray – this shows that the Dictalogic USB device MSI and Extension are successfully installed and communicating.
TIP : You would need to manually install extension for Microsoft Edge browser by following this link
Create a Hardware profile :
After successfully installing MSI and Extension,
Plug in the USB foot pedal or Speech mic to your computer.
Go to Device Configuration under the Configuration tab in the Administrator dashboard.
Click on Add to add hardware profile for connected hardware such as foot pedal or Speech mic.
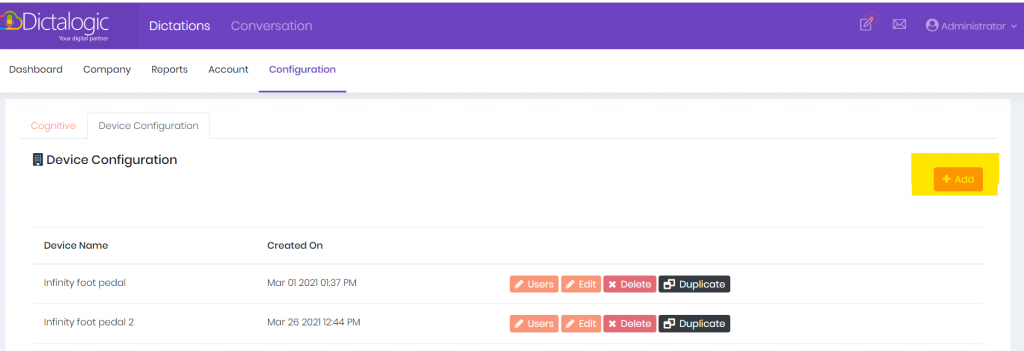
The Device Configuration window opens, where the device name and button actions are configured.
For example : To Configure a Play button on a foot pedal
- Press and release a “Play” button on a foot pedal until the browser intercepts the button event id.

2. Set Play from Action drop down to bind foot pedal “play” button with Dictalogic.
Do the same for the Forward and Rewind buttons and set behaviour from the Action field.
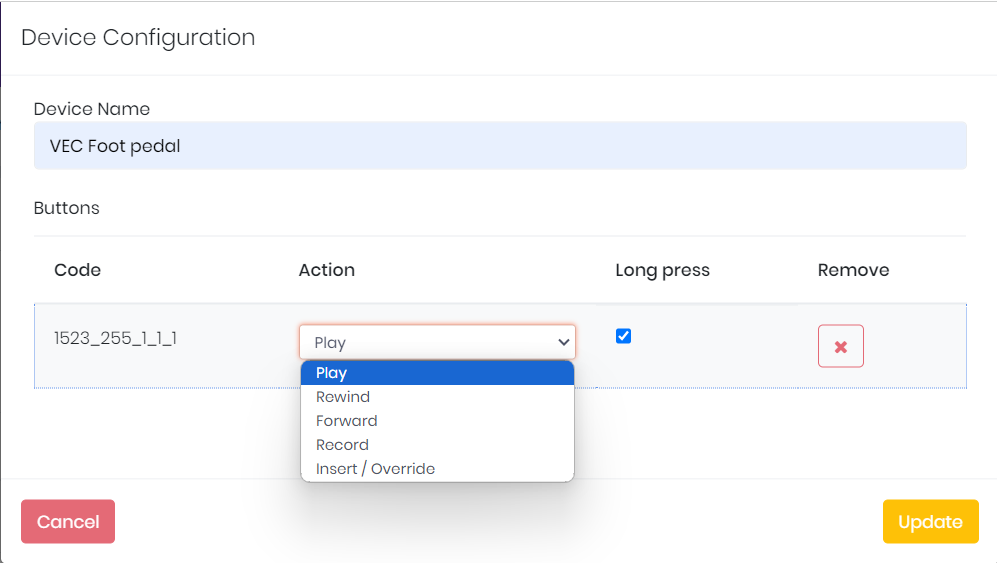
TIP : Select Long Press checkbox if you wish have the long press behaviour when pressing button on a hardware.
Click on Update once all device buttons are configured, as shown in the image below.
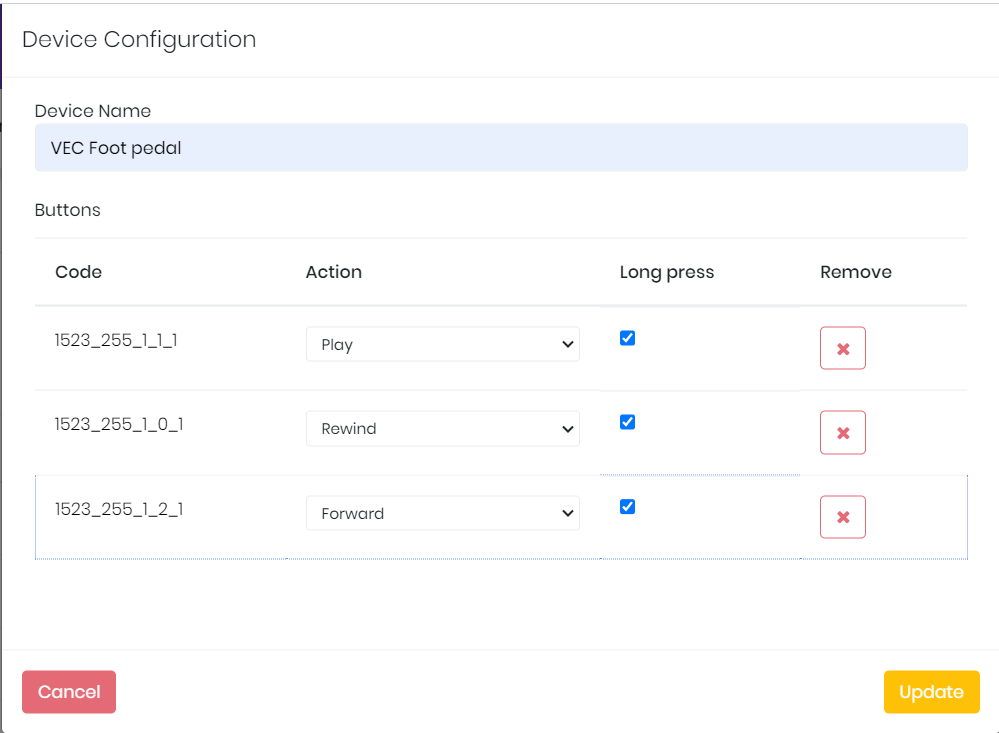
You have successfully configured the hardware on the Dictalogic cloud solution.

Assign User to Hardware profile.
Click on the Users button on the device added above and select the User to whom you wish to assign this hardware, and that’s it!
Your device is now configured and successfully assigned to a user.
TIP : Please make sure that the User signs out and signs back in to have the profile updated before using the hardware.
Please let us know if you have any questions regarding this article.
Don’t hesitate to contact support@dictalogic.com Please let us know if you have any questions regarding this article.